
Bathroom Colour Ideas to Inspire You
Bathroom Colour Ideas to Inspire You
Deciding on a colour scheme for your bathroom can feel like a delicate balancing act. Many bathrooms share many of the same features, such as bathtubs, showers, toilets, faucets, and towels, which often (but not always) appear in standard colours, with white and chrome being common.
It helps to have a clear vision that lets you imagine the look and feel you’re trying to create in the space. It’s also vital to keep in mind the size and shape of the room, its intended purpose (luxurious master ensuite or children’s bathroom?), the countertop material types, and the amount of natural light the room will receive. Care needs to be taken that a large bathroom is still a space that feels cozy and comfortable, whereas a small bathroom needs to feel as roomy and spacious as possible. A dark powder with no natural light sources will benefit from a bold choice of colour and lighting.
Best Colour Combinations For Your Bathroom
To help you pick the perfect colour combination for your bathroom, we’ve assembled a list of 2022’s best colours combinations for bathrooms.
Our top four combinations:
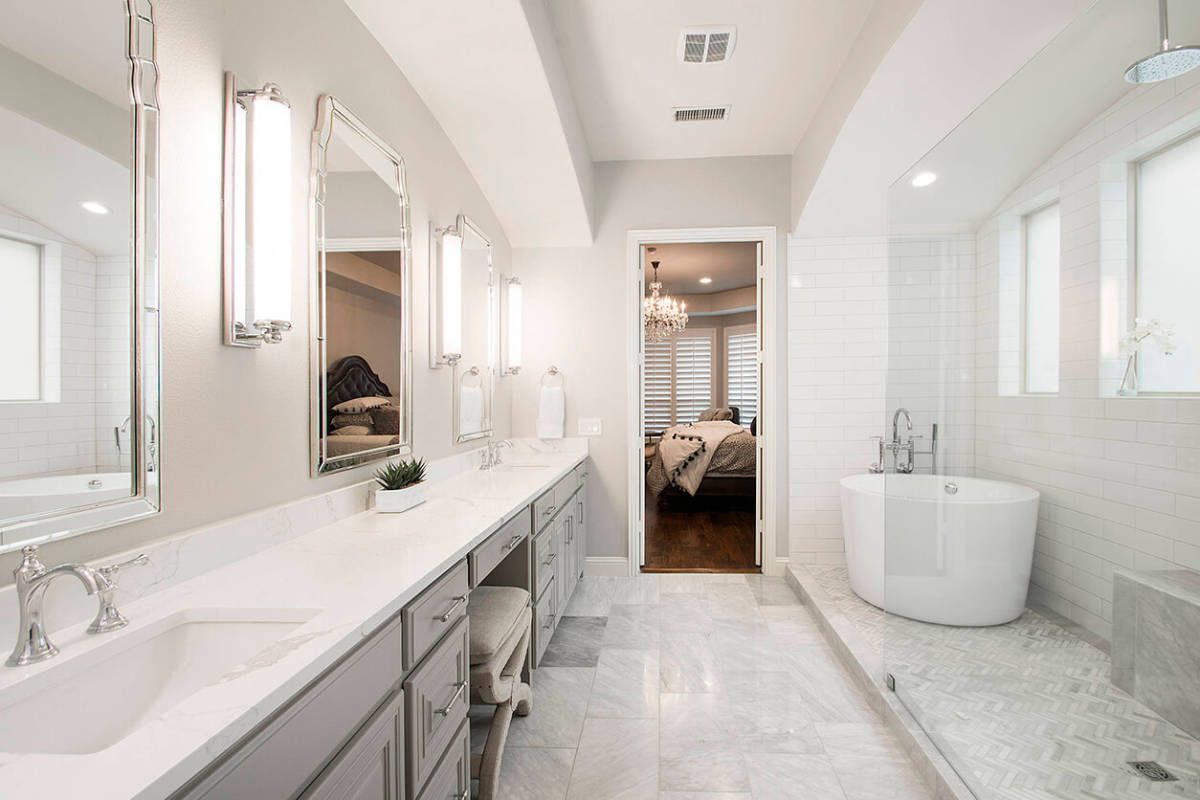
- The Classic – White: There’s a reason white never goes out of style. When in doubt, you can always stick to the classics. You likely already have some white porcelain in your bathroom, so making white the main colour of your space will complement it well. If you want to liven it up a bit without changing your colour scheme, opt for white tiling on your floors or walls, or pick fixtures that really make a statement in your bright white bathroom.
- Ebony and Ivory: If you want a mostly white scheme with some character, pairing white and black can be a great choice. Contrasting tile flooring is a solid pick, but you can opt for some black painted highlights as well (cabinets are a great choice for this) and be creative about incorporating black throughout the rest of your space.
- Contrast: While black and white make for great contrast, black is often too strong a choice for a paint colour anywhere in your bathroom outside of highlights and smaller details. Other pairs of contrasting colours don’t have this problem, however- pair up a creamy off-white with a neutral earth tone for a smoother look.
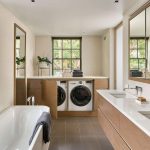
- Neutral and warm: Neutral and warm colours are some of the most popular bathroom colour schemes. Work up a balanced blend from shares of grey, beige, earth tones and wood finishes. A bold fixture or two can really set off a bathroom painted in these colours.
Which Colour Tiles Are Best For Bathroom
Tiles are a great aesthetic statement in your bathroom, whether on the floors, bathroom countertops, or even walls. The colour of the tiles you pick can have a great impact on the feel of the room. Here are some of our top choices:
- White: A classic choice and a fantastic way to make a small bathroom feel bigger.
- Neutral colours: Neutral or earthy colours such as light blue or beige are a great way to make a unique statement without going overboard. You’ll still have the roomy feeling that comes from lighter tiles, but with a warmer touch than pure white.
- Contrast: A more subdued tile colour choice can be offset with a smaller number of tiles of a brighter accent colour for a sharp look. This helps you bring in more colour without being overwhelming. This is also a great opportunity to bring in some tiles with a wilder pattern, as they will be balanced out by the calmer base tiles.
Ways To Make Your Bathroom Look Bigger
For some reason, many of us wind up with bathrooms that feel like they’re on the smaller side. While you might not be able to increase the size of the room, you can make it feel bigger by making some good design choices. Here are some of our favourites:
- Pick White Or Light Colours: We’re repeating ourselves, but this is classic advice for a reason. White reflects light and helps your small space feel larger than it actually is.
- Take Advantage Of Natural Light: If you do have natural light in your bathroom, picking the right layout can help you distribute the light in a way that makes your space feel larger.
- Think Big For Your Mirrors: Wall-to-wall or floor-to-ceiling mirrors are a great touch to give the illusion of more space than there really is.
- Try Curves: Avoiding too many harsh, sharp angles can help make the space feel larger and more inviting.
Summary
While you have ample choice when designing your bathroom, it can also be a lot of fun. With the right choices of paint colours, tiles and fixtures, you can help make your bathroom a design masterpiece. And if your bathroom is on the small side, don’t fret – there are plenty of strategies to help give your room a boost.


